
Monday, 3 October 2011
Cider No. 2
Ingredients for Cider No. 2: some excellent Cotswold Way pears, sugar, and some slightly dodgy Polish apple juice bought at 50p a litre...

Friday, 30 September 2011
Wine No. 5: Secondary Fermentation
Wine No. 5 (elderberry) has gone into secondary fermentation. Again I'm using a plastic 5L bottle, which costs a fraction of the price of a demijohn. These wines seem to produce so little CO2 during secondary fermentation that sealing them in doesn't seem to be a problem - and no need for airlocks.
The wine itself is a lovely colour, significantly darker than the double damson.
And that marks the end of the fruit wine brewing season. It will be nice to have no more brewing bins in the kitchen. At least until the next beer experiment...

Elderberry wine
The wine itself is a lovely colour, significantly darker than the double damson.
And that marks the end of the fruit wine brewing season. It will be nice to have no more brewing bins in the kitchen. At least until the next beer experiment...

Elderberry wine
Monday, 26 September 2011
Update: three wines and a cider
There's been a lot going on:
Wine No. 3
A damson wine using this year's fresh crop, and based on the Ian Ball plum wine recipe. This includes minced raisins for extra body, and I doubled the amount of fruit, to try and make a really rich red. Stoning 10 lbs of damsons isn't a fun job. They had been in the freezer for a couple of weeks and so were tenderised, so I just put them all in the bucket and mashed the stones out by hand, leaving behind a rich slurry. However, I guess about 25% of the stones probably stayed in the mixture.
Cider No. 1
With the fruit season in full swing, I decided to try Ian Ball's "Golden Cider" recipe. Using a mix of pears from our garden and our neighbour's windfall apples, there was easily enough fruit for a 2 gallon brew. It's a semi-cheat recipe in that it uses shop-bought apple juice as the liquid base, but with 10 lbs of fruit pulped in the food processor on top it should have plenty of natural flavour as well.
Wine No. 4
For the second year running we have a great pear crop, so I'm always on the lookout for ways to use them - and what better way? Another Ian Ball recipe, this adapting his apple wine for pear. I put plenty of water in the brewing bin to stop the fruit browning and inadvertently ended up with 2 gallons for a supposedly 1 gallon brew. When I strained this after primary fermentation I ended up with a bit over a litre of extra liquid, which was captured in two wine bottles. But the resulting wine will probably be around the 9-10% alcohol mark rather than 11-12%.
Wine No. 5
I wanted to try this one even though I don't have great hopes of it tasting nice. I collected elderberries over a period of about a month from a range of locations whenever I saw them. I probably started too early; by mid September they were looking much better than when I first started in August. But 5 lbs of elderberries is a lot of little round fruits, and I wasn't going to get picky. They're also not much fun to prepare, in that you have to comb them off the stems with a fork, they roll around like little marbles, and they stain everything. However, once that's done, they just go into the brewing bin and need a quick mash - no stoning, chopping or mincing for once.

Apple and pear pulp for primary fermentation into cider

Two gallons of cider on a summer's day, ready for secondary fermentation

Wine No. 3 (double damson): fruit ready for stoning

Wine No. 3: stoned fruit slurry with a topping of minced raisins

Wine No. 3 ready for secondary fermentation

Wine No. 4 (pear) ready for secondary fermentation

Wine No. 5: elderberries in the brewing bin
Thursday, 25 August 2011
Beer No . 1 - tasting!
With it being Emma's third birthday, and there being a quorum of beer drinkers present, it seemed appropriate to crack open the first 2L bottle of the bitter - two months after bottling. My thoughts were as follows:
Head - surprisingly good, foamy. Head retention not bad.
Flavour - a little bitter but not too bad. Better than expected.
Strength - weak, as expected from the OG measurement.
Texture - poor. I think this is partly due to the low alcohol content. I also noticed that the bottles didn't feel over-pressurised (they still had some give when squeezed) so maybe next time I'll increase the priming sugar to increase the natural carbonation.
Colour - a bit pale for a bitter. To be expected, because I used pale malt instead of crystal. Also I didn't make any effort to avoid the sediment, so the pint was cloudy. Next time I'll use 500 ml bottles, which should be easier to pour without dislodging the solids.
Overall - 6/10. It would be a rather disappointing pint to be served in a pub, but still a not unpleasant bevvie.
Onwards and upwards!
There are some lessons here, plus I have proved I can make something drinkable from the the basic bitter recipe. So I can now use that as the starting point for experimenting. And I can confidently brew several different 1-gallon batches at the same time without waiting for the results of the previous effort.
But first up will be a couple of different efforts:
- Emma's birthday marks 4 months to Christmas. Time to get a seasonal ale started.
- Our pear tree is groaning with fruit, and our neighbour has more windfall apples than he can do anything with. Cider time! Fortunately, the Ian Ball book has cider recipes.
Friday, 12 August 2011
Wine Nos. 1 and 2: Racked
Wines No. 1 (damson) and No. 2 (elderflower) have been racked into clean demijohns and put into the cellar. A couple of weeks ago I added potassium sorbate and sodium metabisulphate to kill off the yeast. I didn't add any finings as I thought there were looking pretty clear, and Ian Ball suggests it's not necessary if you rack them for long enough.
During the transfer process I was able to have a little taste. The elderflower tastes pretty good; with 9 months maturing I hope it will be rather pleasant straight out of the fridge. The damson was less impressive; it doesn't have the body of a true red wine so, if it is drinkable, may end up as a rosé.
The picture below shows the homebrew-shop demijohn retailing at about £7, and the Iceland demijohn retailing at £1 and including a gallon of free mineral water.

Monday, 27 June 2011
Beer No. 1: Bottling
Time to bottle the beer. I syphoned off the contents of the brewing barrel into PET Coke bottles. The brewing barrel is rather too big for such a small batch, making it very difficult to leave the sediment behind - a demijohn might be better next time. So I was forced to leave a bit behind, resulting in a yield of just under 4 litres. The 2L bottles are also fairly useless for small batches, as once they are opened the pressure will be lost. So I need to start collecting 1L or even 500ml bottles.
I added 1 tsp of sugar per litre of beer to the bottles, then put them to mature for about 6 weeks. I also took a sample for gravity measurement and tasting. The final gravity (FG) was 1.001, which corresponds to an alcohol content of about 3.2%. As I hoped, the alcohol took the edge off the bitter taste, although it's still quite hoppy. It had no body to speak of, but hopefully the priming sugar will add some sparkle and improve that.
But so far, not bad at all for a first attempt.

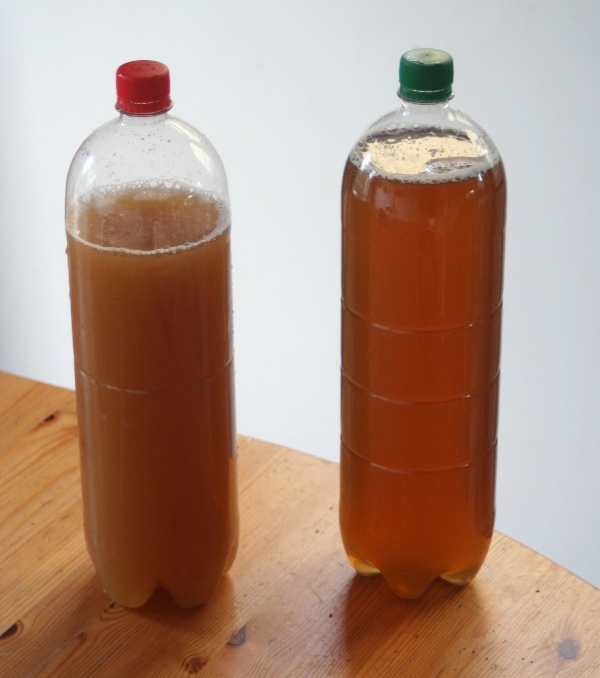
Syphoning in progress

Guess which one of these came from the bottom of the barrel
I added 1 tsp of sugar per litre of beer to the bottles, then put them to mature for about 6 weeks. I also took a sample for gravity measurement and tasting. The final gravity (FG) was 1.001, which corresponds to an alcohol content of about 3.2%. As I hoped, the alcohol took the edge off the bitter taste, although it's still quite hoppy. It had no body to speak of, but hopefully the priming sugar will add some sparkle and improve that.
But so far, not bad at all for a first attempt.

Syphoning in progress
Guess which one of these came from the bottom of the barrel
Tuesday, 21 June 2011
Wine No. 2: Secondary Fermentation
The procedure for this one is different from Wine No. 1. Here, all the sugar is added in the first fermentation. The wine is then racked into a demijohn to continue fermenting for a few weeks. The recipe then calls for a second racking to clear for 6 months or so before bottling.
So this process was pretty straightforward, just straining the brewing mix into a demijohn and fitting the airlock. As usual, I took a little taste, and I have to say it tasted remarkably like white wine. Not hugely elderflowery (compared with the elderflower cordial Lesley made last summer), but maybe subtle is good here.

A little way to go before this is clear
Friday, 17 June 2011
Beer No. 1: Primary Fermentation
Mmm, beer.
Time to try a beer - this one adapted from Ian Ball's "best bitter". This is a "semi-natural" recipe, more complex than a kit, but using dried malt extract and some refined sugar. I nipped down to Mattock Lane Pharmacy to pick up the ingredients - the only thing I couldn't get was crystal malt, so substituted pale malt instead.
Into my preserving pan went Medium Spraymalt dried malt extract, Goldings hops, crushed pale malt, and a 50/50 mix of white granulated sugar and light soft brown sugar. I included some brown sugar to try and make up for the paler malt being used as an adjunct.
After boiling for half an hour, the mixture was left to cool for most of the day, then cold tea and lemon juice were added. It was strained into a brewing vessel and 2.5g of Young's Ale Yeast added.
I took a gravity sample and was a little disappointed to find that the OG was only 1025, which the hydrometer booklet said corresponded to a potential alcohol content of about 3.2%.
I took a little taste of the sample - of course it tasted very weird as it was sweet rather than dry, but it also tasted incredibly bitter. I did think that the required 1.5oz of hops seemed a lot. Maybe when there's some alcohol present this will be offset a bit, but I do wonder whether tastes have changed a bit since the 80s when that book was written.

My kind of prescription

Fresh Goldings hops

The bubbling cauldron

The sample - looks like beer, doesn't taste like beer (yet)
Friday, 10 June 2011
Wine No. 2: Primary Fermentation
Time to start off an elderflower wine. Yesterday I popped down to York Stream, battling heavy rain (me in shorts and t-shirt, of course), steep and muddy banks, and the risk of car clamping, to gather the tail end of the season's elderflower crop. I think they were a little past their best - some heads had already lost all of their flowers - but foragers can't be choosers, and they still gave off plenty of aroma when gathered in a carrier bag.
I used Ian Ball's recipe (from a book that's been sitting on our bookshelf for at least 15 years). The method is rather different from Wine No. 1.
But it's pretty simple. Into the bucket went the washed elderflower heads and some chopped sultanas. I then dissolved 1.75 lbs of sugar in water in a saucepan - it soon became apparent that this is really cane sugar wine flavoured with elderflowers (as you'd expect - flowers don't have much sugar content). When the sugar solution had cooled, it went into the bucket along with half a cup of strong cold tea (for tannin) and the juice of two lemons (for acid).
The recipe suggests using Marmite as a yeast enhancer, but since I already had some Yeast Nutrient, that went in along with the wine yeast. Then the bin was topped up to 4 litres with cold water and left to ferment in the now well-used North corner of the kitchen.

Elderflower heads, ready to meet their fate

The mixture, ready for fermentation
Tuesday, 7 June 2011
Wine No. 1: Secondary Fermentation
After 5 days in the bucket, it was time to take the damson wine to the next stage. The fruit had formed a gooey crust on top of the liquid, there was a distinct alcoholic smell, and bubbles could be seen (and heard) rising through the gloop. I’d been taking a peek at the contents every day, but in theory the mixture should have been protected from any airborne nasties by a blanket of CO2 being produced by the fermentation.
The first step was to strain the liquid into a demijohn. I tried pouring it through my brewer’s funnel, which has a built-in filter, but this was much too fine and the liquid could only pass through drop by drop.
So I quickly sterilized another funnel (I later discovered that the filter on the brewer’s funnel is removable), placed my coarse straining bag in the funnel, and strained the liquid through that. Each time the bag filled up, I squeezed out the last drops of liquid and discarded the leftover cake of solids. I discovered that damson juice squeezed through a straining bag can reach quite a velocity, and was glad that I was wearing an apron.
The second step was to add 900g of granulated sugar to feed the secondary fermentation. Chris’s recipe suggests initially just adding enough cold water to dissolve the sugar, “which is considerably less than you think”. So I thought I’d dissolve the sugar in a pint glass, in two batches, and add each in turn to the demijohn.
I quickly discovered that the volume of 450g of sugar is nearly a pint, so my plan wasn’t going to work. Instead I just funnelled the sugar into the demijohn and then topped it up with cold water.
The final step was to fit the airlock (after some quick internet research confirmed that you’re meant to leave the cap *on*) and replace the brew in the North corner of the kitchen, where it will remain for about 6 weeks.
The liquid is very murky, as the photo shows, and it will be interesting to see how well it clears. I came back a couple of hours later and there were already bubbles forcing their way through the airlock. All systems go.
During the process I was able to have a little taste (a spot of finger licking, and trying a pinch of the leftover must) and it tasted like very rough cider. Hopefully that’s normal at this stage, and not indicative that it’s already turning to vinegar.

Must, ready to be strained

Liquid from primary fermentation

Squeezed solids, ready for the compost heap

In goes the sugar

Airlocked and ready for secondary fermentation
Thursday, 2 June 2011
Wine No. 1: Primary Fermentation
This is a damson wine, using the Dr "Down Under" Owen recipe and method. It's being started early in the season due to the discovery of about 5 lbs of 2010 damsons in the freezer. They looked to be in decent condition, still tasty and undamaged.
Firstly, my new DAB radio was tuned to Jazz FM. Then, approx 5 lbs damsons (frozen, stone-in weight) was stoned and then mashed in the brewing bin with boiling water, and the following added:
1 tsp Young's pectolase
1 heaped tsp Young's super wine yeast compound
1 level tsp Young's yeast nutrient
The bin was left to ferment in the North end of the kitchen, which at this time of year is generally in the low 20s Celcius.

Stoned fruit

Primary fermentation ready to go
Subscribe to:
Posts (Atom)